Course Meshes
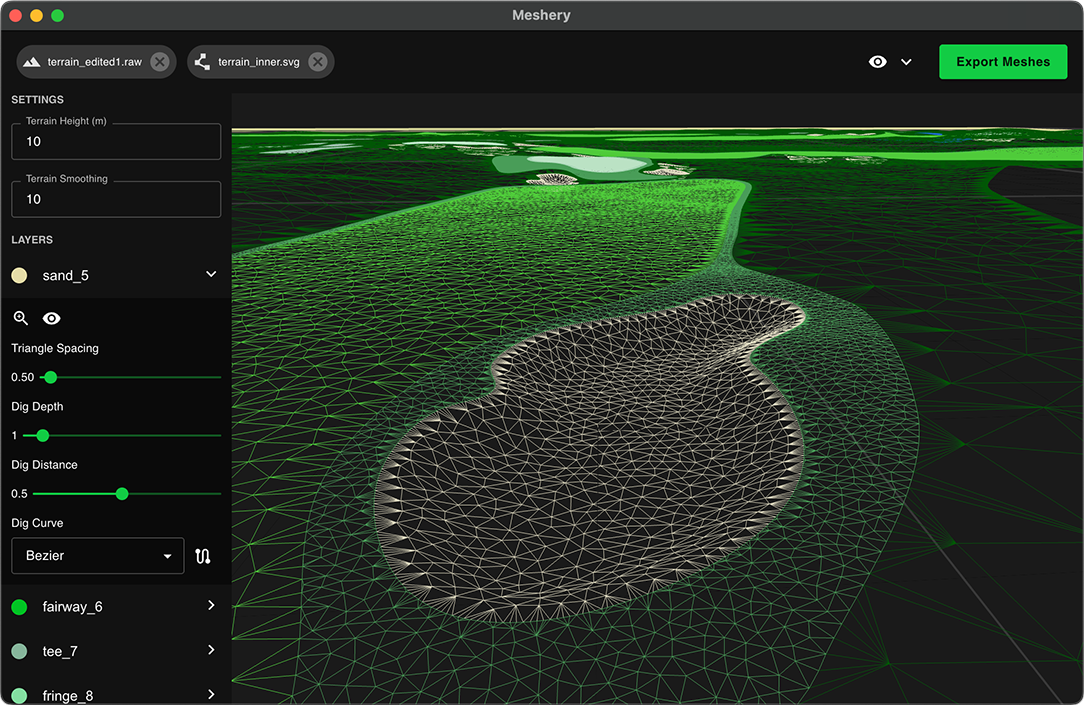
To create separate playable surfaces, like fairways and greens. We need to convert the basic shapes we drew in Inkscape into 3D objects that are sloped to match our terrain. We created a specialized tool for this, called Meshery.
Creating Meshes
-
Download and open the Meshery tool.
On Windows, you may get a warning from Microsoft Defender. Click More info and then select Run anyways
-
Click the Import RAW Terrain button and locate the raw terrain data file you created in the Course Terrain step.
-
Click the Import SVG button and locate the SVG file you created in the Course Map step.
-
Set the Terrain Height value to the same thing as your Terrain Height in Unity.
To find your terrain height
-
Click the terrain object in your scene.
-
Click the Terrain Settings tab in the Inspector on the right.
-
Scroll down to your Terrain Size section and you should see Terrain Height
-
-
In Meshery you can optionally set a Terrain Smoothing value for you terrain, to smooth out any rough / bumpy terrain. For more fine grained control, consider editing and smoothing your terrain in Unity and exporting a new RAW file for Meshery.
-
Click Export Meshes and select a the location to save your OBJ file containing your course meshes.
Import Meshes Into Unity
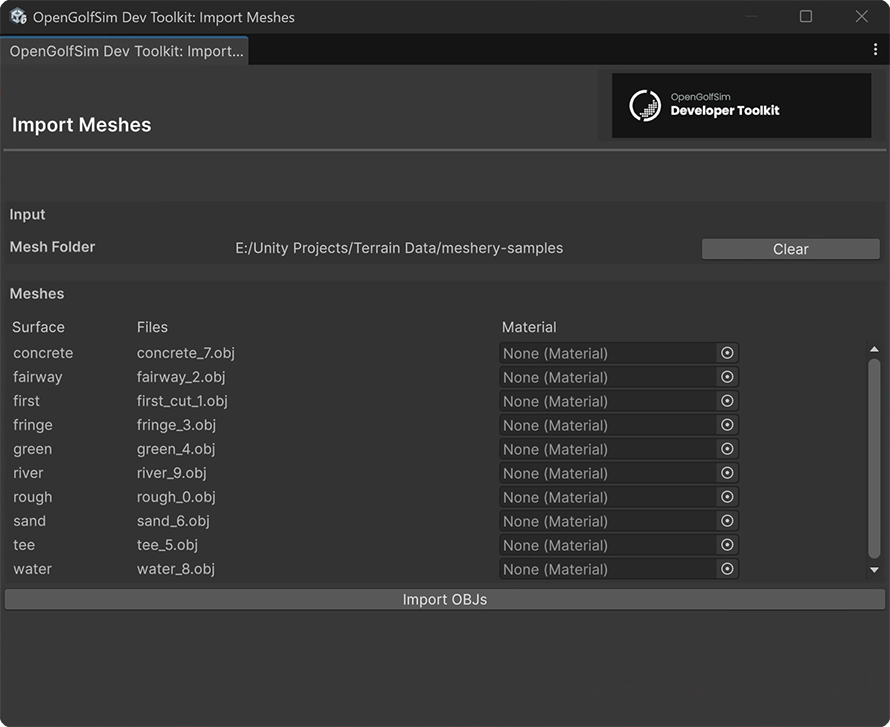
Next you’ll want to import the OBJ file into your Unity project. These meshes will sit just above your terrain layer. Make sure you’re using the project template and have the OpenGolfSim Developer Toolkit package, which should include a tool for importing and batch assigning base materials to your meshes.
-
In your Unity project, go to Tools > OpenGolfSim > Import Meshes
-
Click the Select Folder button and locate the folder on your computer that was created by the Course Meshery tool.
-
At this point you can batch assign materials like grass and sand to your course surfaces.
-
Click the Import OBJs button and wait for the script to automatically import the course meshes to your scene.
-
Once the task finishes, you should see a new parent game object with the name of your file.
-
After import, you’ll likely need to reposition the parent game object to sit above the terrain by offsetting the Y position to be above the terrain.